Saturday, June 26, 2010

NEW LOAD BEARING EXTERIOR WALL


This is the framed opening for the pocket door. The pocket doors are six feet wide. This requires an opening of 12', three feet on either side for the pocket doors to slide into. The beam at the top is three 11-7/8" by 1-7/8" micro lams nailed together. They are supported by posts on either side made up of four 2x8 ganged together.


Photo #2 shows the entire framing and a section of Structural Insulated Panels to the right which form the entire new structural bearing exterior wall.


Photo #3 shows the connection between the existing glulam rafters and the new exterior wall. We made our own metal brackets using the steel door and window lintels left over from demolishing the brick exterior. In this photo, you can see the original exterior wall to the left before demolition.


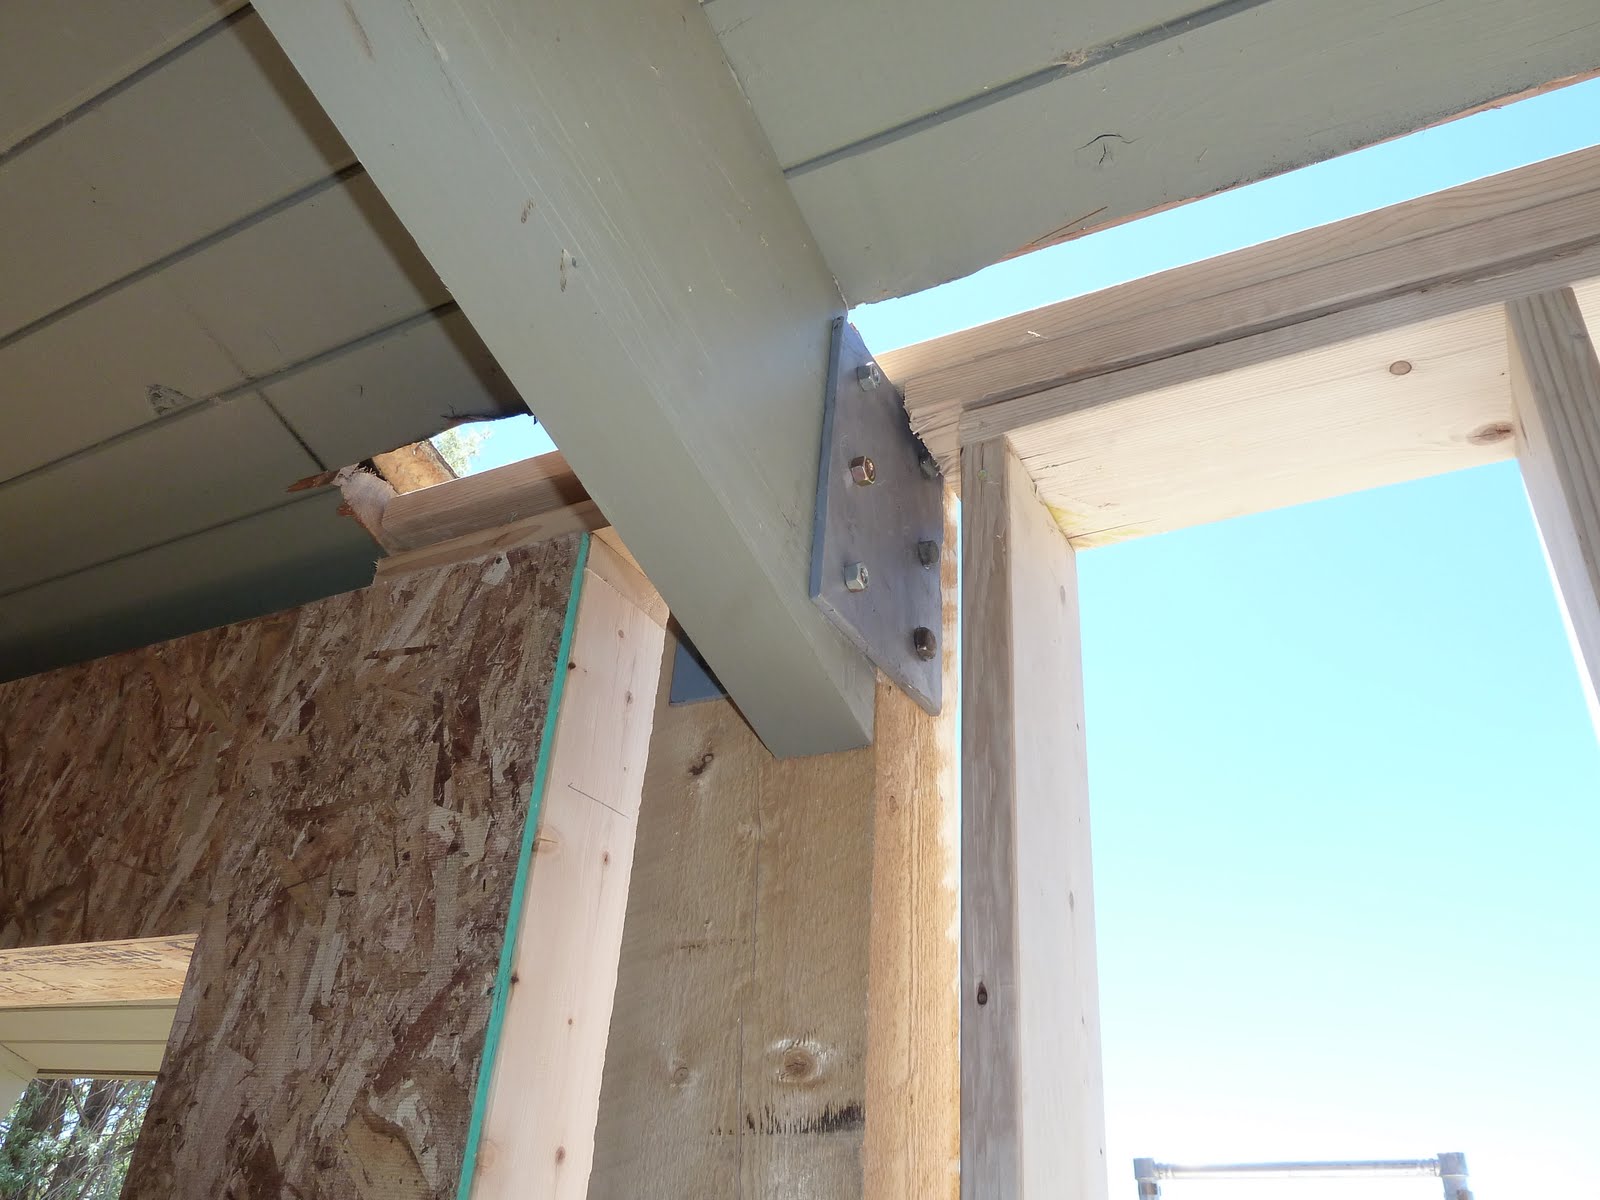
Photo #4 shows another connector that we fabricated.
Photo #5. Now that the new load bearing wall has been built, the old one can now be demolished.

Sunday, June 20, 2010

CUTTING THE ROOF BACK

Bruce used Wade's chain saw to cut the existing roof back. He had to stop often to sharpen the few teeth that were left after cutting through nails. Later we cut off the exposed ends of the glue-laminated rafter beams.


The rolling tool box is working out well.


The existing wall is still in place. We will build the new structural support wall first and then remove the existing wall which is supporting the existing roof. On the picture on the left, you can see some of the structural insulated panel wall being assembled. This section will be the new kitchen door way out to the new deck.


Friday, June 11, 2010

PANZER COMMANDANT


Hienrich zer panzer commandant shows us how it is done. Ya, he vill drive backwards into Poland and tell zem he was just leaving.


On Memorial Day I saw a fox crossing the lawn and a Red Tail hawk flying over head. That weekend I hiked up to Stoner Mesa and came across eight elk. There were still small patches of snow on the ground and the Aspen trees had just started thier leaves.


The Canadian Geese play in the irrigation water.


This is the fox that crosses the field every day.


The view out of the front.


On my trip to Belt Salvage to buy some I beams I found the remnants of this Huey helicopter. In addition to salvaged building steel they had railroad tracks, antique farm equipment, antique trucks and many other odds and ends.


Sunday, May 30, 2010

THE SOLAR STORAGE FLOOR


The steel beams are installed with metal decking on top. A tree inch thick layer of rigid insulation is installed on top of the metal decking. Then the vapor barrier on top.


A mat of re-bar is installed on top of the vapor barrier. Spacers called "high chairs" are placed under the re-bars to space them 1-1/2" above the bottom of the concrete slab.


The heat tubes were then installed atop the re-bar mat. Welded wire mesh was then placed on the very top of the slab to reduce cracking when the concrete shrinks during the curing process.


This is a view of the heat tubes as they exit the new heat storage & collector concrete slab and then enter the existing crawl space.

The Stem Wall


The beginning of the stem walls was installing the re-bar and connecting it to the re-bar of the footing. The oiled form work was then installed.


Wednesday, May 26, 2010

REAR MUDROOM


Wally and Dusty excavated the hole for the foundation and did an excellent job. The concrete team, the RC Company, built the form work and placed the concrete for the footings in one day. This included the Rear Mud Room and the Sun Room at the front. In subsequent days they built the form work and placed the concrete for the foundation walls.

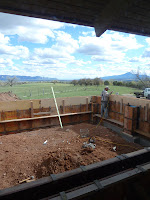
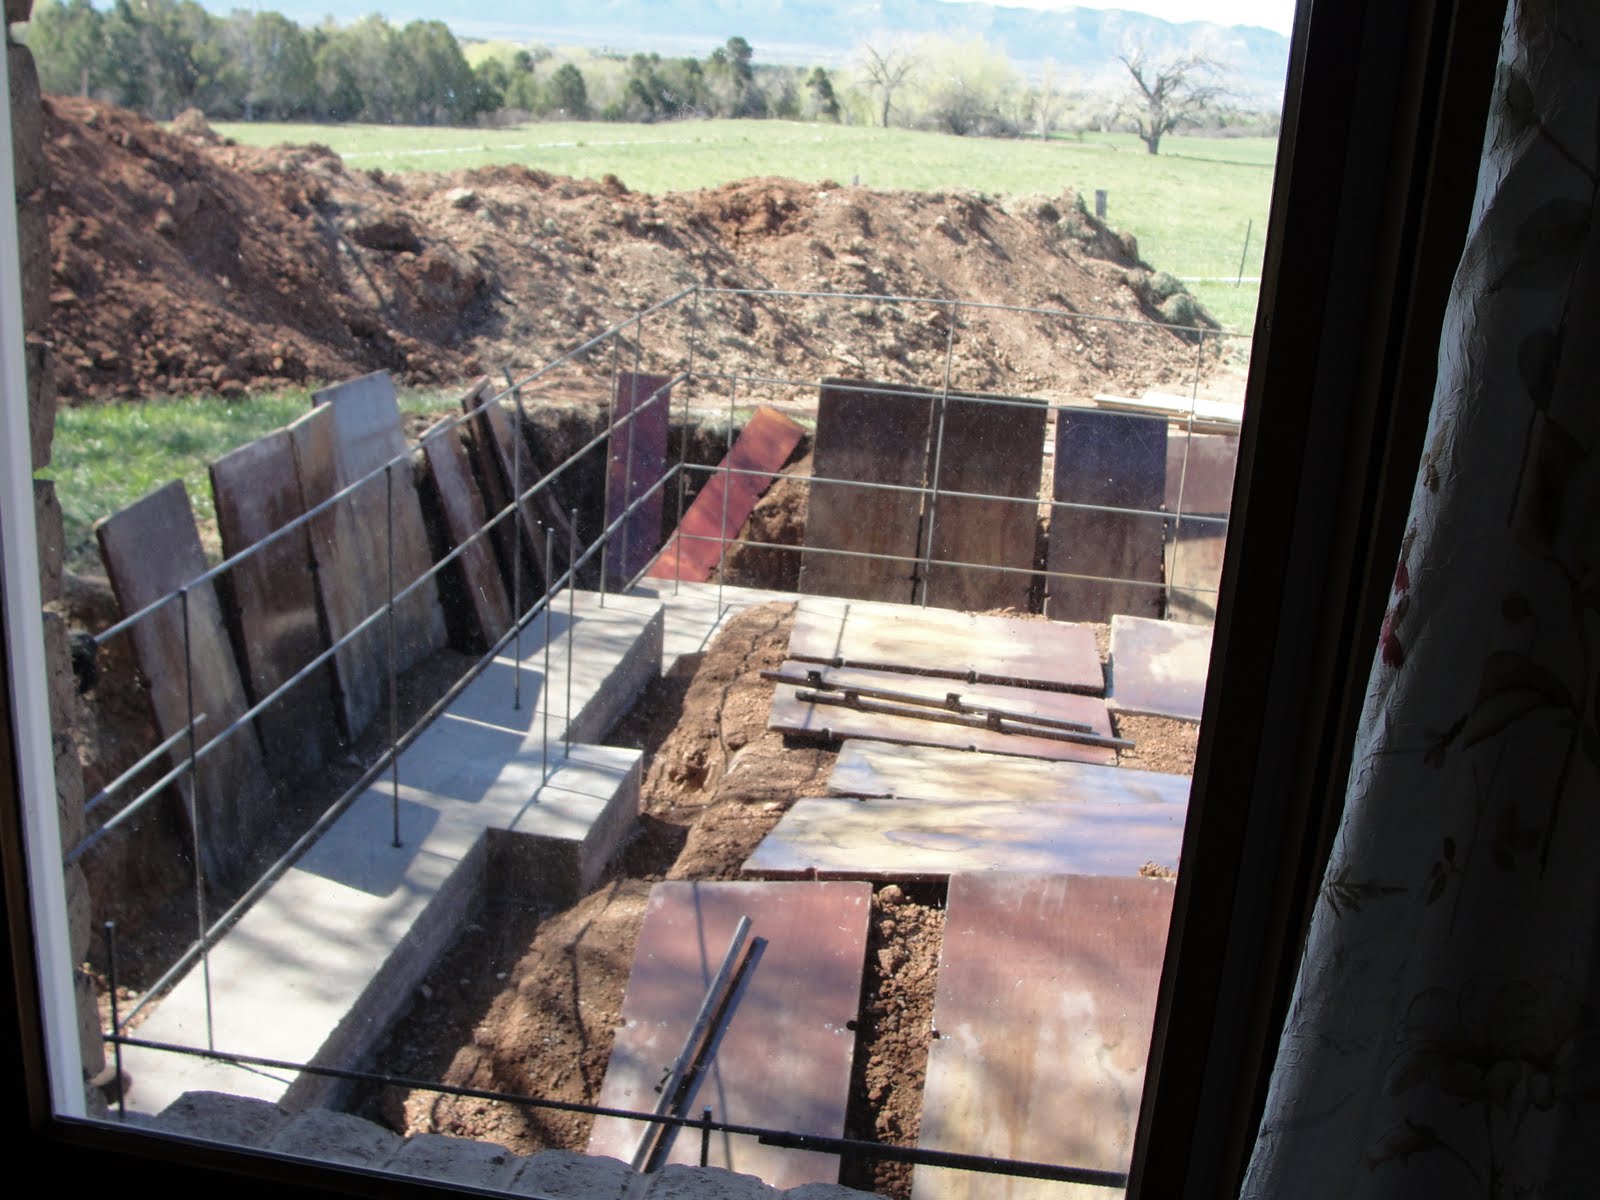
The hole in the ground at the front and back left us with no way to enter and exit the building. This required building a temporary foot bridge over the open foundation. We used a metal gate, a fork lift pallet and some plywood to build it. I had hoped to start on the Sun Room first but this access problem required that I start on the Mud Room first.


To solve our access problems I built the floor of the Mud Room. This solved the access problem nicely but I could not leave the floor sheathing exposed to the rain so I had to build the walls and the roof. First Bruce and I painted the foundation wall with damp proofing. Then we applied a strip of bitumen to cover the seam between the foundation and the new floor.


Bruce and I then framed out the walls which required cutting back the existing roof with a chainsaw. Wade got the job of cutting out the existing roof which is made up of a layer of protection board with 3" of rigid insulation under that all on top of 4"x6" tongue and groove cedar planks. We framed the new walls to support the existing roof. After that we framed a roof. It's a good thing Bruce knows how to frame and intersecting gable because I sure don't know how.


It was exciting to sheath the framing and see the form of the Mud Room appear. Next we applied bitumen sheets to the roof sheathing to keep the Mud Room water proof until it is shingled.

SHIT JOBS

The last few days have required taking care of some non-carpentry work in preparation for later work. We ( me and Bruce, my fellow carpenter) painted the foundations with tar sealant and we managed to stay fairly clean.


The next job was to demolish the brick wall one brick at a time and then clean them up from the site. We chiseled out the brick, picked them up and placed them in a wheel barrow, rolled them across the concrete floor and dumped them into the bucket of the Bob Cat. For some reason they call a bob cat a "skid steer" here. I only broke one of the three windows (they are due to be demolished anyway).

We transported and stacked the timber on site but later decided to store it in the barn. This required a mixture of using a fork lift and manual labor. We brought the fork lift as close to the barn as possible and then lifted the timbers by hand into the barn. There were six 10"x10"x18' columns, one 8"x16"x20' beam, two 8"x 12" beams and seven 8"x10" beams and some assorted others. We were bushed by the end of that routine.


Tomorrow we will back fill the outside of the foundation at the front of the building. This will require dumping a foot of dirt into the hole at a time and compacting it with a "jumping jack" in between each layer. Wade's Brother Dusty , Wally the excavator and Dusty's brother in law and I previously back filled the interior of the foundation by dumping in soil and using a wheel barrow and shovels to place the soil inside of the foundation.


When we finish this Bruce and I can get back to some carpentry work.